

Photogrammetry Helps Create Virtual Reality School
Imagine it’s your first day at a new school. You walk through the front gates, overwhelmed by the sheer number of people surrounding you and trying to figure out who is going to be your best friend and who is not. Due to the pandemic, the situation is a bit different. Everything is remote and online, to minimize contact. And it is surely not the same as it was. Therefore, we decided to give the opportunity to parents and kids to get to know all the school's facilities via a perfect 3D model of a more than 110 years old building and all the needed info like what is like being there. And while doing this we preserved every single detail of the building for heritage documentation purposes as well.
How does one go about that task? The building is large and there are countless details inside and outside the building. There are several steps of course and the process spans from acquiring the data to posting the final product to the web page for users to see and use.
We consider the 3D digitization of a historic building using photogrammetry. The models are to be used for as-built documentation, validation of restoration work, detailed photorealistic renderings, and web visualization of the building. Acquiring images is the first step. You need to make sure that the coverage of pictures is at least 80% while choosing the appropriate angle of the camera. In our case, we were using several different angles (90 degrees, 80 degrees, 70 degrees and 60 degrees). Also, do not forget to turn on the camera georeferencing functions.
For this specific project, we really wanted to get a state-of-the-art result, so only for the external model we captured 1550 images altogether and the average size of the picture was 10 MB. It took us 2 days to capture all these images due to bad weather at that time, catching the cloudy days to make sure that the light temperature was almost constant. And the first part of the job was done!
Once you get the hang of it, the process is nice and easy, and very straightforward. First, we uploaded the captured images into the 3Dsurvey. Then we needed to select the known coordinates and run the bundle adjustment. Since we were facing a lot of material and wished for an as realistic a model as possible, we selected the ‘hybrid mode’, which brings out the best from Global and Incremental modes.
It ran on a 128 GB RAM, RTX 3080ti for a few hours. We’ve selected the maximum of 16 CPU workers and 20.000 maximum detected features. The feature detection level was set to High. The final step to creating the photorealistic model was the ‘reconstruction’ option, which was set to High as well. We’ve set it running during the night and it took around 10 hours to complete.
To get good results with the building fronts, and façade, we advise you get your scans done in layers. Try to get a few different camera trajectories, for instance, 6m from the façade and then 3m from the façade. We advise not to take photos too close to the front with too big of an overlap. We’ve noticed that in cases, where the features captured are too similar, some shots might get misplaced. To avoid that is to not capture it from a 90 degrees angles, but instead try to capture the features from upside down, say 60 – 70 degrees on the Y-axis and about 25 degrees on the X-axis. That way you’ll get more depth from your objects, shades will be more visible, and you’ll be able to capture the details more accurately.
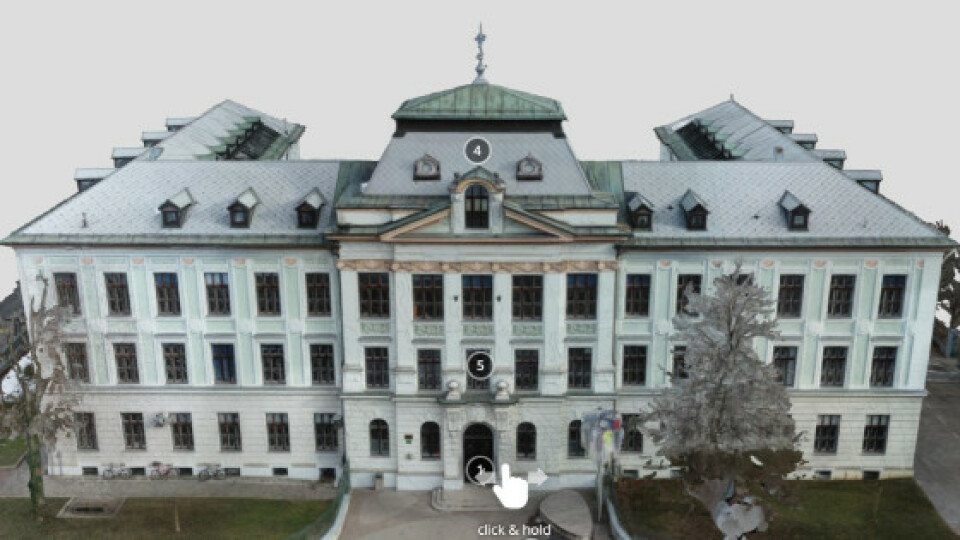
Examples of Western Facade
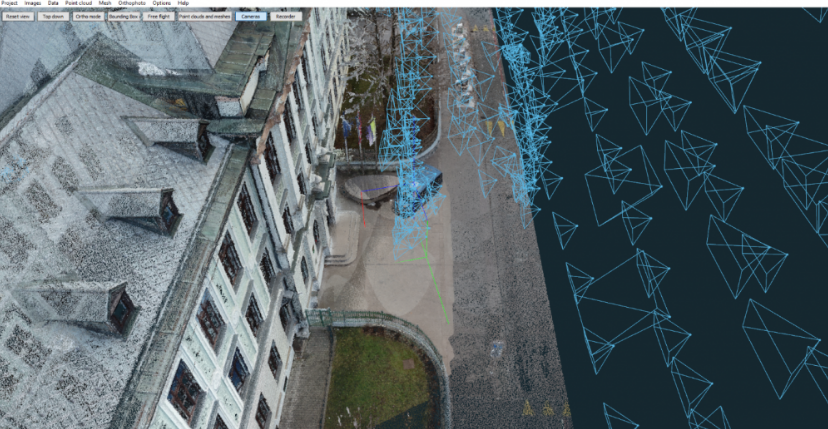
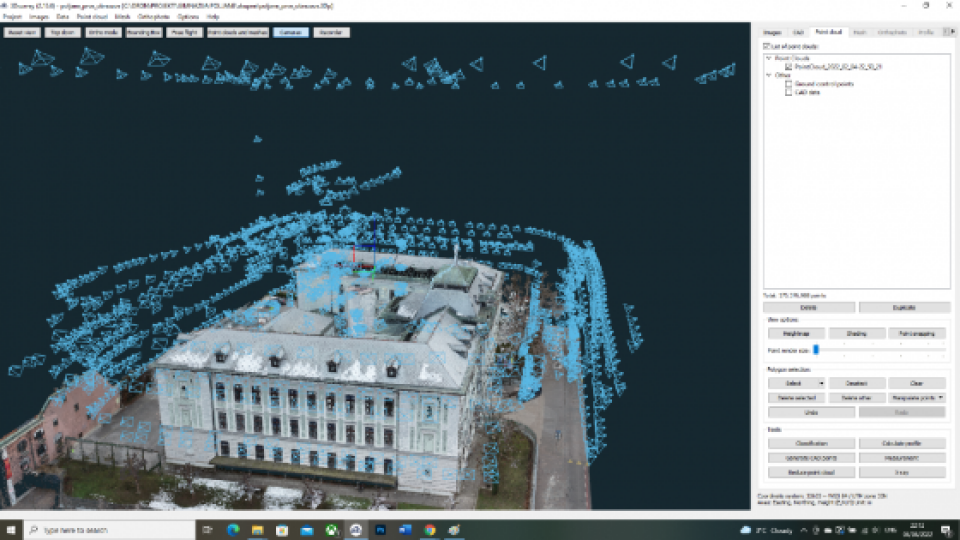
Camera positions facade mapping.
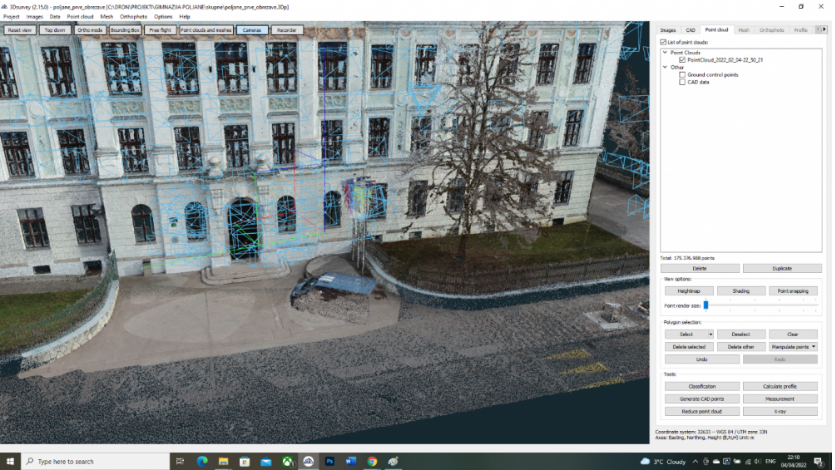
Detailed facade mapping.
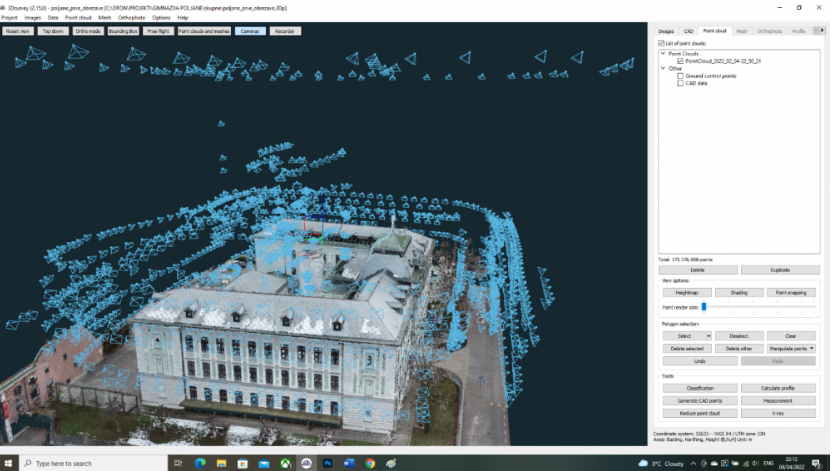
Camera position for 3D model.
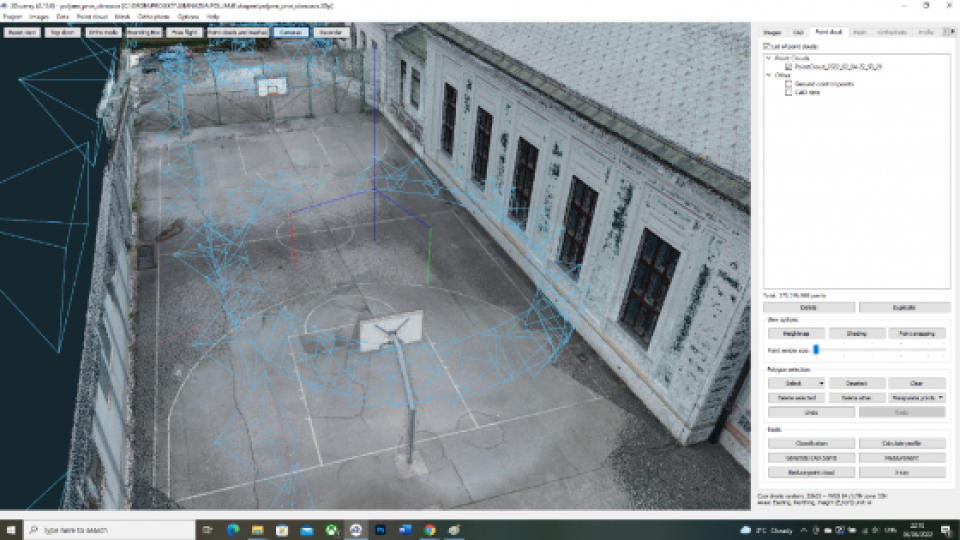
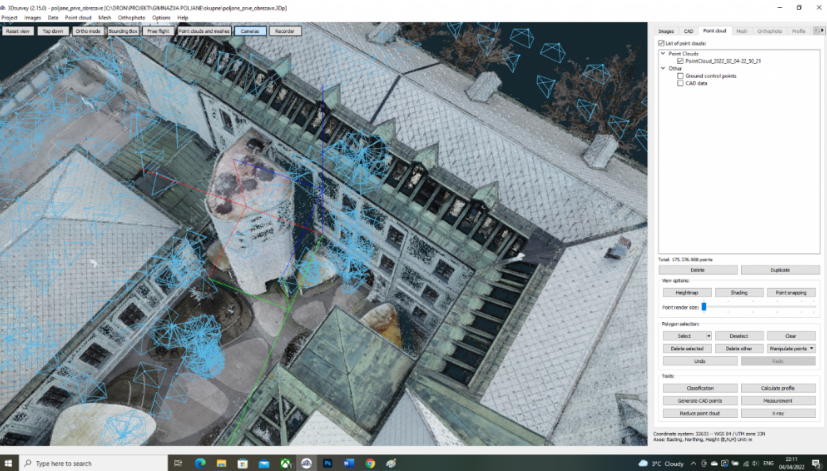
Another thing I’d like to point out is that you shouldn’t forget about the details and that you should plan ahead. The basketball court in the back is a vast, empty space but important for your target audience, i.e., future high school students. We haven’t forgotten about the basketball hoops and we’ve planned ahead to devote a few shots to them as well. Long, thin, and shiny objects such as metal rods, chimneys, and basketball hoops in this case are especially hard to capture. In any case, there will be some ‘spray’ and those objects will never be as perfect as big, solid objects.
The light bounces off them a lot. Luckily you can trim a lot of sprays down with 3Dsurvey tools. They come in very handily. Word of advice: use the ‘Bounding box’ tool when you do it. (read more here) You’ll save a lot of time.
3Dsurvey had no problems registering the captured images and placing them into the total project even though they were far apart from the rest of the batch.
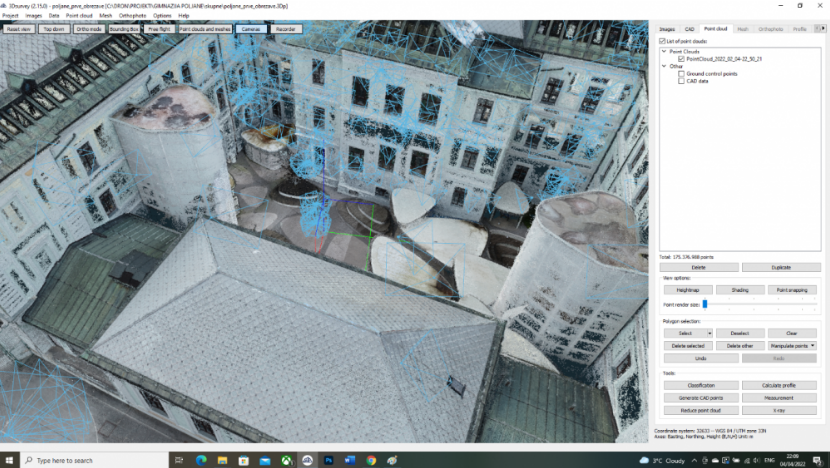
How the 3D Model was Created
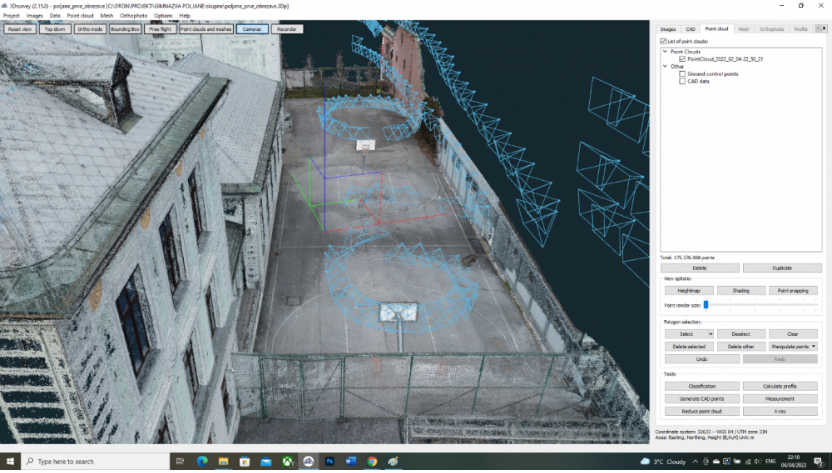
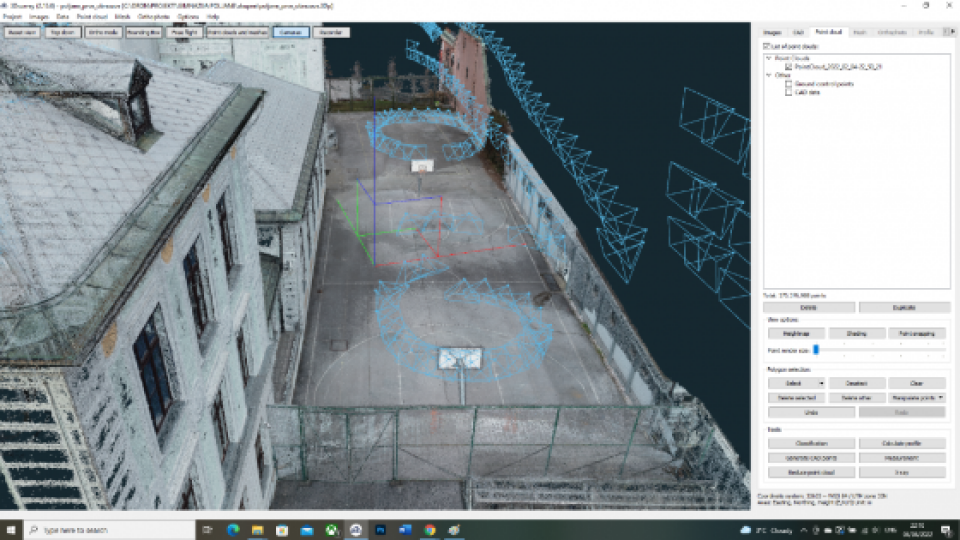
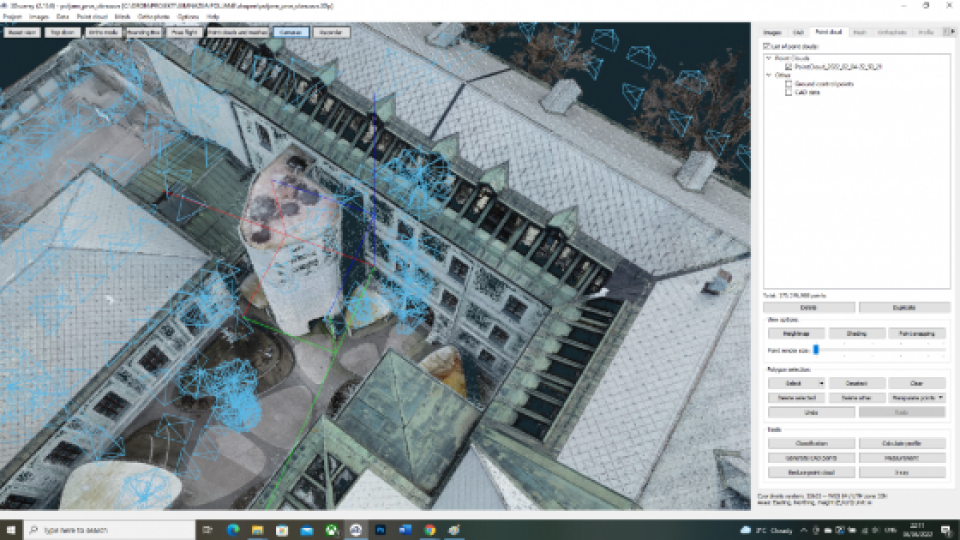
The separate detailed flight on a schoolyard.
Circle flight mission for more details.
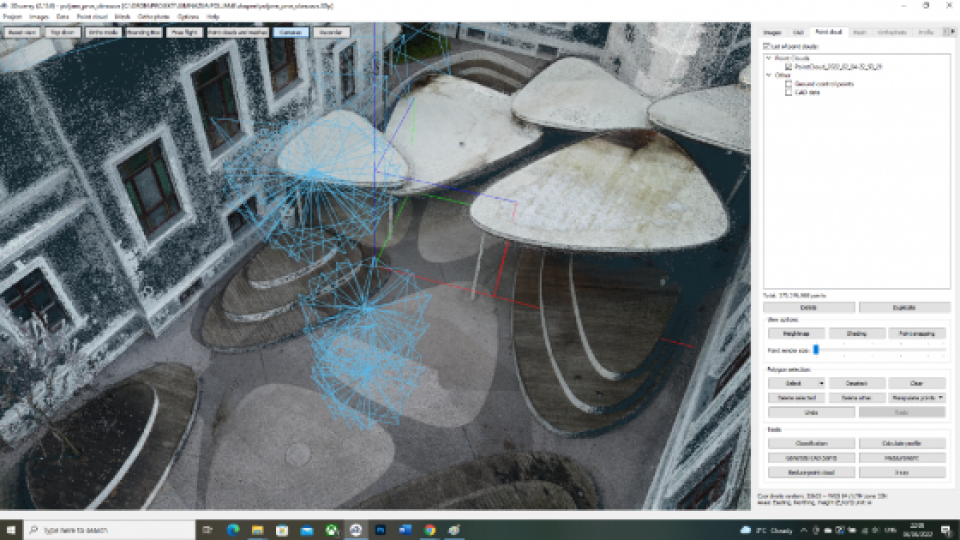
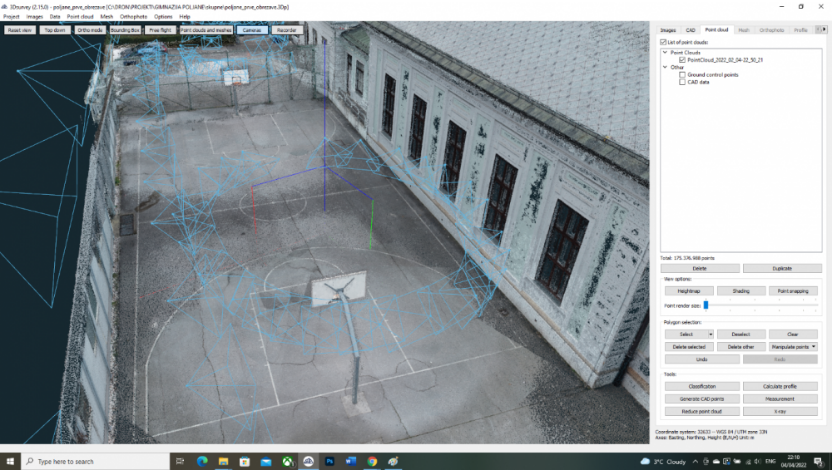
The last thing to point out in this case study was the enclosed yard area. The building is devised in such a way that it was hard to access all the area in order to capture the photos. If you don’t pay attention to all the areas of your subject, then you’ll get blurry parts (if you’re lucky) or even holes in the façade. Here’s how we resolved the issue: by capturing photos on the Y-axis and taking the photos in 360 degrees on different parts and from a different heights.
Capturing photos on the Y-axis.
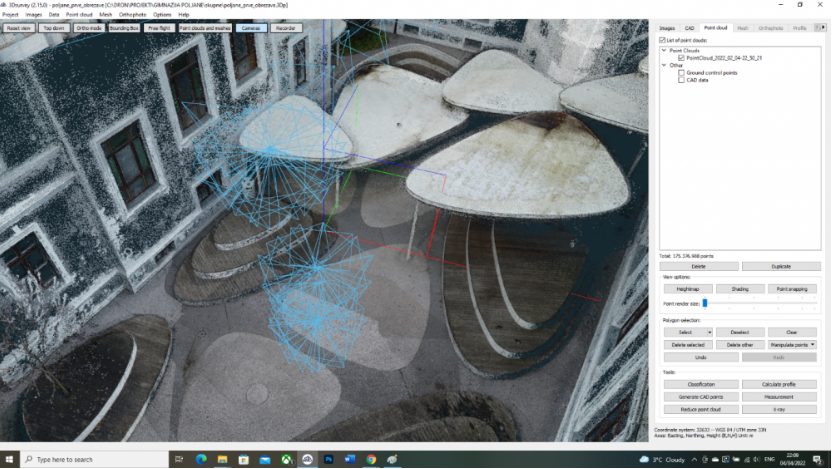
360 degrees photo.
Our clients and our team are very happy with the final results. Once again, the fantastic software by 3Dsurvey proved that it can handle large data and complicated orientations. The entire school was later exported to .obj and .ply files which we used to make the final product.
Sit down and relax. You are kindly invited to check out an almost real-life school environment by clicking here.
Do you have questions about this case study?
Get in touch with 3Dsurvey, and they would be happy to answer any questions you have about pricing, suitability, availability, specs, etc.

Related products


![Do-Giant-Tortoises-Make-Good-Neighbors-1[1].jpg](https://cdn.geo-matching.com/vRMO2Edp.jpg?w=320&s=a6108b2726133ff723670b57bc54c812)


