


INS Maintenance and Troubleshooting Guide
Inertial Navigation Systems (INS) combine Inertial Measurement Units (IMU) with external sources of information like GNSS to provide users with the carrier object’s position, orientation, and velocity. This article highlights the most essential tips for maintaining INS devices and troubleshooting possible errors.
First Use
Users should adhere to the following guidance to ensure the best possible INS performance and avoid errors:
Read the device’s latest Interface Control Document (ICD) and Graphical User Interface (GUI) manual. These documents provide the most up-to-date information on the INS and its capabilities. The ICD and User Manual corresponding to the device’s firmware are available in the USB supplied with every order. Alternatively, users can contact Support specifying the INS serial number to receive the required documents.
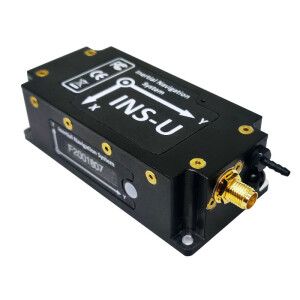
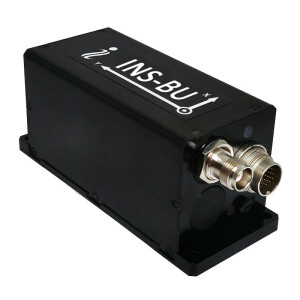
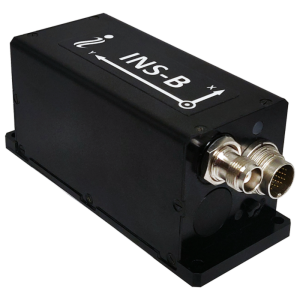
Use the power supply (usually 12 VDC) provided by Inertial Labs to turn on the device. If this is impossible, note the supply voltage requirements in the device’s datasheet. Once the INS powers on, it undergoes an initialization period of approximately fifteen seconds. During this time, the LED indicator on the device lights yellow. Once this process is complete, the LED lights will be red, and the INS will be ready to receive commands.
Inertial Labs provides users with the proper serial-to-USB FTDI converter to operate the INS. Use the latest drivers and set the correct latency time for the converter (4 ms). To do this in Windows OS, open Device Manager → Ports (COM & LPT) → Communications Port (COMX), where X is the number assigned by the OS → Properties → Port settings → Advanced → set Latency Timer to four milliseconds.
Device Configuration
Once the device is ready, users should configure the following set of parameters:
·Data Output Settings
·Initial Location Data
·Alignment Angles and Antenna Positions
·(OPTIONAL) AutoStart Mode
The INS should always have the proper COM port baud rate, output data rate/format, and initial alignment time. By default, the INS has a baud rate of 115200 bps and a data rate of 50Hz. Different output data formats transfer a varying number of bytes. As such, users may need to increase the baud rate when changing the output format or increasing the data rate. In any case, the device must remain stationary during the initial alignment time. If this is impossible, set this time to zero seconds to skip this process. However, this may decrease the device’s dynamic accuracy.
If possible, users should enter the device’s approximate accurate latitude, longitude, altitude, and date in the “Devices Options” menu of the GUI, allowing the INS to start correctly even without visible GNSS satellites. Additionally, check the “Auto” box for magnetic declination in devices with magnetometers, enabling the INS to calculate the proper heading using a magnetic heading.
Alignment angles set the angle between the INS axes and the carrier object, allowing users to mount the INS in any orientation relative to the object axes without affecting the orientation calculation. Similarly, the antenna position settings enable users to install the antenna(s) in any orientation. Store this position in the object axes, where the positive is to the right, forward, and up directions. Note that a secondary antenna must be at least 1.5 meters from the primary.
The AutoStart mode allows the INS to start data output after it powers up without any commands from the host. Alternatively, the INS operates in Continuous mode when this checkbox remains unchecked. This mode enables the device to constantly output data in the format the user selects only after receiving the command to start.
Operability Troubleshooting
There are several ways the INS indicates errors to users. For more INS troubleshooting details, visit the Inertial Labs’ Knowledge Base for solutions. The following section highlights some of the most common issues encountered:
LED Status
The color and behavior of the embedded LED indicator allow users to see the current INS status or interpret an appeared error:
· Blinking Yellow LED (5 sec) – indicates a system initialization error caused by a mistake in reading the parameters from the device’s flash memory or an error in the GNSS receiver initialization. After blinking, the device switches to idle mode, and the LED lights solid red. It is then still possible to send commands to the device and receive answers. However, this excludes commands to start device operation.
· Blinking Yellow LED – indicates a non-maskable interrupt (NMI) hardware error. In operational mode, the device continues data output.
· Blinking Red LED (5 sec) – indicates an IMU initialization error. After blinking, the device switches to idle mode, and the LED lights solid red. If so, sending commands to the device and receiving answers is still possible, but the device will not start operating.
· Blinking Red LED – indicates a hard fault hardware error. In operational mode, the device continues data output.
Contact Support with your device’s LED information if these errors persist.
Unit Status Word
The USW provides information on the state of the INS. The low byte (0-7) indicates a failure or information, and the high byte (bits 8-15) shows a warning or information. A byte of zero indicates normal operation with no errors. See the table attached.
Performance Troubleshooting
Users should contact Support for any issues in device performance and provide the following required information:
1. Drawing of the Setup – Ensure the drawing includes:
·The object axes (direction of movement) and INS axes.
· The location of the antenna(s), specifying which antenna is primary and which is secondary.
·The distance from the antenna(s) to the INS.
2. Data Recording – Use the INS GUI to set the OPVT2AHR output format with a data rate of 200Hz. For this, increase the baud rate to 460800 bps and send our Support team the created .bin and .prm files.
If recording data using the GUI is impossible, record data directly from INS COM1 and save the *.prm file. Use the “Save parameters” item from the “Parameters” menu in the GUI before or after the data recording.
If recording data is impossible, save the current INS configuration using the “Save parameters” item from the “Parameters” menu in the GUI and send the created *.prm file to Support.
This information ensures that our team can check the INS configuration and provide comments and recommendations regarding your performance issues.
Further Questions
Inertial Labs prioritizes customer satisfaction, offering extensive technical support and customization services to meet its clientele’s varied demands. For questions on the topics discussed in this guide, contact [email protected].
Do you have questions about this article?
Get in touch with Inertial Labs, Inc., and they would be happy to answer any questions you have about pricing, suitability, availability, specs, etc.


