
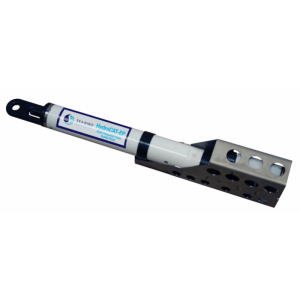
Best Practices for HydroCAT-EP CTD System: Before, During, and After Deployment
The HydroCAT-EP is a high-accuracy multiparameter probe that measures conductivity, temperature, pressure, dissolved oxygen, pH, chlorophyll fluorescence, and turbidity. All of the HydroCAT-EP’s sensors are integrated into a single package with many of them sharing a common flow path. As each sensor has unique requirements, the user must make proper maintenance and deployment considerations to ensure data quality and sensor longevity. When maintained properly, the HydroCAT-EP is a powerful standalone device for monitoring long-term water quality and environmental conditions without the need for regular service and maintenance. The Sea-Bird Scientific UCI software is the primary interface with the HydroCAT-EP. UCI is loaded with tools for assessing sensor drift and recalibrating prior to and after deployment. This technical note outlines general practices for maintaining the sensor hardware as well as the basics of using UCI to calibrate and evaluate sensor performance. For more in-depth information, consult the HydroCAT-EP instrument manual.
Description of Sensor Technology
The core of the HydroCAT-EP consists of Sea-Bird Scientific CTD sensors – a high-accuracy thermistor and internal-field conductivity sensor, along with an optional strain gauge pressure sensor. It is also equipped with the SBE 63 optical dissolved oxygen sensor and HC-pH glass bulb pH sensor. The HydroCAT-EP can optionally include the HydroCAT Optics fluorescence and turbidity sensor (also called the “HCO”), which is an adaptation of the larger ECO-FLNTU optical sensors. When the HydroCAT-EP takes a sample, all parameters are aligned into a single data scan.
The HydroCAT-EP’s pumped flow path connects the temperature, conductivity, pH, and dissolved oxygen sensors to a robust anti-fouling system that prevents biofouling from affecting sensor performance. The pump enables high data quality and sensor alignment while helping prevent sediment accumulation. The HydroCAT Optics fluorescence and turbidity sensor is equipped with a copper faceplate and integrated bio-wiper to keep the optical window clear of biological growth.
Maintenance and Care
When all sensors are integrated in the HydroCAT-EP, a common set of maintenance recommendations will keep the instrument in optimal field condition. Before and after deployment, it is important to conduct general maintenance for the HydroCAT-EP in addition to individual sensor checks.
Connector Care
The HydroCAT-EP has 5 connectors: the primary RS-232/SDI-12 bulkhead connector, the pH sensor connectors (male and female), and the HydroCAT Optics connectors (male and female). Prevent moisture from contacting the pins while handling the connectors.
- Primary Bulkhead Connector:
1. Lightly lubricate the inside of the dummy plug/cable connector with silicone grease (DC-4 or equivalent) before/after deployment.
2. Install the plug/cable connector, aligning the pins.
3. Place the locking sleeve over the plug/cable connector. Tighten the locking sleeve finger tight only.
Do not overtighten
- pH Connectors:
1. After removing the pH sensor, dispense high purity isopropyl alcohol (90% or greater) into each socket on the female connector to displace any water, then purge all liquid with compressed air.
2. Inspect the pins on the HC-pH sensor’s male connector for moisture and corrosion.
3. Inspect the O-ring for any damage or debris
4. Apply a light coating of O-ring lube to the face seal.
5. Ensure that seawater or KCl storage solution does not contact the pins.

- HydroCAT Optics Connector: in most cases, the HydroCAT Optics should not be removed; all interfacing with the optical sensors can be done through the HydroCAT-EP, so there is no need to access the HydroCAT Optics connector directly. Check to make sure that the sensor is properly secured to the HydroCAT-EP body before deployment. A loose connection may expose the connectors to moisture.

Pressure Port Plug
The copper pressure port plug has a small vent hole that transmits hydrostatic pressure to the pressure sensor inside the instrument, while keeping most particles and debris out of the pressure port. Periodically (approximately once a year) inspect the pressure port to remove any particles, debris, etc.:
1. Unscrew the pressure port plug from the pressure port.
2. Rinse the pressure port with warm, de-ionized water to remove any particles, debris, etc
3. Replace the pressure port plug.

Anti-fouling Cartridges
The HydroCAT-EP contains two Bis(tributyltin) oxide (aka “TBTO”) cartridges that provide the primary protection from biological growth. These release a small amount of TBTO into the flow path and eventually lose their effectiveness. Spent cartridges generally have a patchy or bleached appearance as TBTO is depleted. Sea-Bird recommends replacing these cartridges after every deployment, as it is difficult to estimate the lifespan of the cartridges. These cartridges are beneath the copper anti-fouling guard. Wear gloves and eye protection while handling them.

Filling and Flushing
Clean the sensors and internal flow path by flushing DI water or a cleaning solution through the plumbing. Some procedures require filling with a standard for sensor calibration/verification. Follow these instructions to rinse or fill the plumbing:
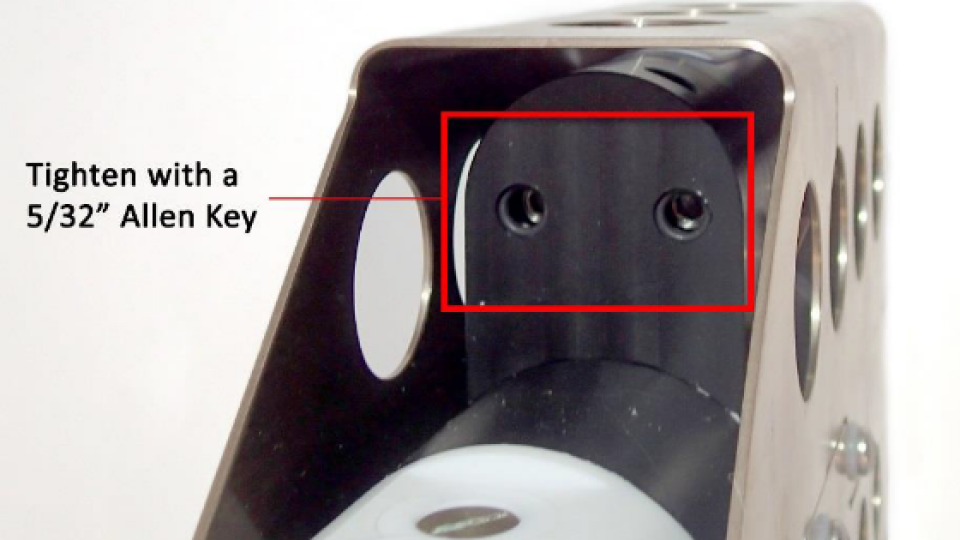
1. Expose the intake and exhaust ports: loosen the two captured 5/32” cap screws holding the copper anti-fouling assembly to the housing clamp using the 5/32-inch Allen wrench (supplied). Carefully remove the copper anti-fouling assembly.

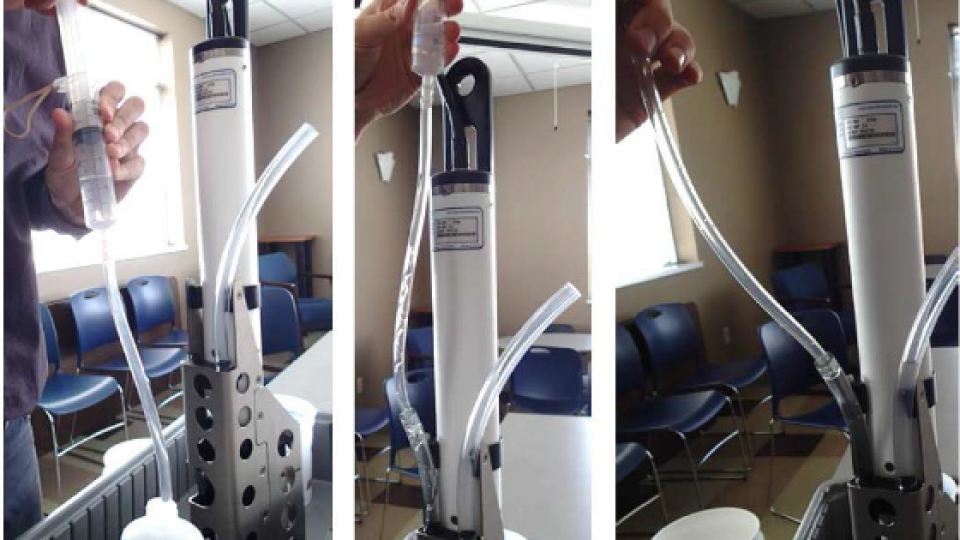
2. Place the HydroCAT-EP in a bucket with the bulkhead connector pointing upwards. Plumbing will be in a U-shape (intake and exhaust are pointed upwards).
3. Attach a piece of tubing (at least 10 cm long) to the intake or exhaust.
4. Fill syringe from the syringe kit (supplied with the HydroCAT-EP) with approximately 30 ml of the desired solution.
a. Rinse with clean distilled or DI water to remove sediment.
b. Clean the conductivity cell and oxygen sensor with a 1% Triton X-100 solution and rinse thoroughly.
c. For more extreme biological growth, fill the plumbing with a 500 - 1000 ppm solution of bleach and let soak for up to 5 minutes. Rinse thoroughly.
5. Fill the flow path: attach tubing from the syringe to the other plumbing port. Push the syringe to fill the plumbing with the chosen solution. Verify that you have at least 3 to 5 cm of fluid head on both the intake and exhaust.

6. Flush the flow path: push the syringe in and out to flush the plumbing and sensors for the desired amount of time. Maintain at least 3-5 cm of fluid head on both sides.
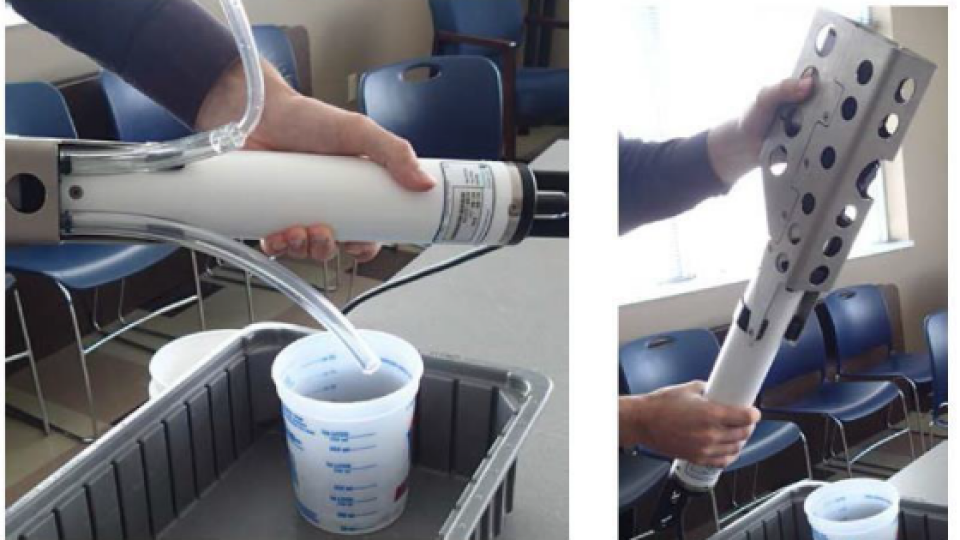
7. Drain the fluid: turn the HydroCAT-EP over and empty fluid into a bucket, pushing on the syringe to help remove all fluid. Remove the tubing and shake the instrument to remove all fluid.
a. Take note of the amount of sediment drained from the flow path. In high-sediment areas, consider flushing more frequently for optimal pump operation.

8. If a significant amount of material drains from the sensor, repeat steps 4-7 until the fluid is free of sediment.
9. Reinstall the copper anti-fouling assembly on the housing. Secure the assembly to the housing with the cap screws; alternate tightening the screws to secure, maintaining even gaps on the sides.
Pre-deployment Considerations
Sea-Bird recommends sending the HydroCAT-EP in for service and calibration annually to obtain the highest quality data. However, if that is not an option, the UCI software has several checks that allow the user to verify the state of the sensors.
Conducting Checks in UCI
Within UCI, users can check if the temperature sensor, conductivity sensor, and the optical fluorescence/turbidity sensors have drifted. Users can also recalibrate the pH sensor with stable pH buffers.
- Temperature Check: compare the output of the HydroCAT-EP’s temperature sensor to an accurate reference sensor.
- Conductivity Check: verify if the conductivity cell is fouled or damaged by measuring standard solutions of known conductivity.
- pH Calibration: calibrate the glass bulb HC-pH sensor with stable pH buffer solutions. The calibration is valid for 90 days of stability.
- Optics Check: compare the response from the optical sensors to a previously-paired Calibration Check Cap (also called the “HCC”). If data are significantly different from the data when the Calibration Check Cap was paired, the HydroCAT Optics may require recalibration.
The Conductivity Check and pH Calibration require filling the flow path with specific standards and buffer solutions. Follow instructions in “Filling and Flushing” above.

Pairing the HydroCAT Optics to a Calibration Check Cap
The Calibration Check Cap is a tool for evaluating performance of the HydroCAT Optics fluorescence and turbidity sensors. It is not meant to be deployed with the HydroCAT-EP and must be stored properly to function as a reliable verification tool. Before the Optics Check can verify drift of the optical sensors, the user must pair a HydroCAT Optics sensor to a Calibration Check Cap to establish baseline reference data.
The Calibration Check Cap check cap contains a surface that reflects a stable reading back to the HydroCAT Optics sensors. The pairing procedure saves these values to the HydroCAT-EP. If the Calibration Check Cap is stored and maintained properly (eg, it is not modified, fouled, or damaged), the output from HydroCAT Optics in response to the Calibration Check Cap should not change. Therefore, if these values are significantly different after the deployment, this implies that the HydroCAT Optics sensors have drifted and require recalibration. Each Calibration Check Cap is different, so users must run the Optics Check with the Calibration Check Cap that was paired prior to the deployment.
Follow the instructions below to pair the Calibration Check Cap to the HydroCAT Optics:
1. In UCI, navigate to Sensor → HydroCAT-EP → Advanced → Pair Optics Cal Cap
2. Enter the serial number of the Calibration Check Cap. Only one cap can be paired to a single HydroCAT Optics at a time. It is crucial to use only the paired cap for the Optics Check.

3. Click “OK”. UCI will begin pairing the Calibration Check Cap to the HydroCAT Optics.

4. UCI will notify the user when the pairing process is complete
5. Remove the Calibration Check Cap from the HydroCAT Optics and reinstall the protective covers. Store the Calibration Check Cap in a dry place where it will not be damaged
Deployment Considerations
Once deployed, the HydroCAT-EP requires minimal maintenance. Primary concerns are purging bubbles from the flow path at the beginning of the deployment and avoiding sediment loading.
Deployment Orientation
Sea-Bird recommends deploying the HydroCAT-EP vertically with the connector end pointing upwards in most situations. This places the plumbing in an upright U-shape, allowing for optimal flow and easier removal of bubbles. If deployed in an inverted U-shape (connector pointing downwards), bubbles may become trapped near the oxygen sensor, biasing data and affecting pump performance.
If deploying in a horizontal orientation, incline the HydroCAT-EP so the exhaust is pointing 10° above horizontal to reduce bubbles and sediment accumulation. Horizontal orientation is not recommended, as it promotes sediment accumulation in the conductivity cell.

Removing Bubbles
Upon submerging the HydroCAT-EP, lightly shake the instrument and run the pump for 5-15 minutes to help eliminate bubbles from the flow path.
In UCI, click on the “Start Pumping” button to run the pump for 15 minutes, or send the “pumpon” command from a terminal to run the pump for 2 minutes.
Sediment considerations
While the pump can prevent significant sediment accumulation, deployment areas with turbidity greater than 200 NTU can result in poor flushing from sediment ingestion. If deploying in a high sediment area is unavoidable, deploy the HydroCAT-EP in an inverted U-Shape, with the connector pointing down. This will allow sediment to exit through the intake and exhaust when the HydroCAT-EP is not sampling, but may trap bubbles in the flow path.
A sudden drop in dissolved oxygen concentration after a spike in turbidity (as evidenced from the HydroCAT Optics turbidity data) may indicate that sediment has collected at the oxygen sensor. This can occur if the HydroCAT-EP is deployed in the recommended upright U-shape and is exposed to a period of high turbidity. If this occurs, flush the flow path (see “Filling and Flushing” above) and observe the effluent to see if a large amount of sediment is flushed from the flow path.
Post-deployment Considerations
Upon recovering the HydroCAT-EP, conduct the following steps:
- Rinse the instrument with freshwater.
- Stop logging data as soon as possible. Note: the pump will automatically stop running when out of water.
- Flush the flow path with freshwater or Triton X-100 solution.
- Rerun sensor checks in UCI.
- Upload and process data in UCI.
- Install the yellow protective sticker over the inlet and exhaust. This prevents debris from entering the flow path.
- Reinstall the protective cap over the HydroCAT Optics
pH Sensor Storage
The HC-pH sensor must be kept wet to preserve the reference junction. If left completely dry for more than an hour, the reference junction will likely require replacement.
If the HydroCAT-EP will be out of water for more than a few minutes but less than 24 hours, fill the plumbing with fresh water (not deionized water). This will keep the pH sensor moist between deployments. Sea-Bird recommends recalibrating the pH sensor between deployments.
If storing the HydroCAT-EP after recovery, remove the HC-pH sensor and install it in the storage block, then fill the storage with KCl solution. Replace the HC-pH sensor with the dummy block. Take precautions not to allow moisture to contact the connectors (see “Connector Care” above).

Inspect the HydroCAT Optics Wiper
The HydroCAT Optics wiper cleans the optical window before each sample. After each deployment, inspect the wiper blade to see if it is no longer making full contact with the copper faceplate. Replace if necessary.


Related products


